Final Scene
A Final Render
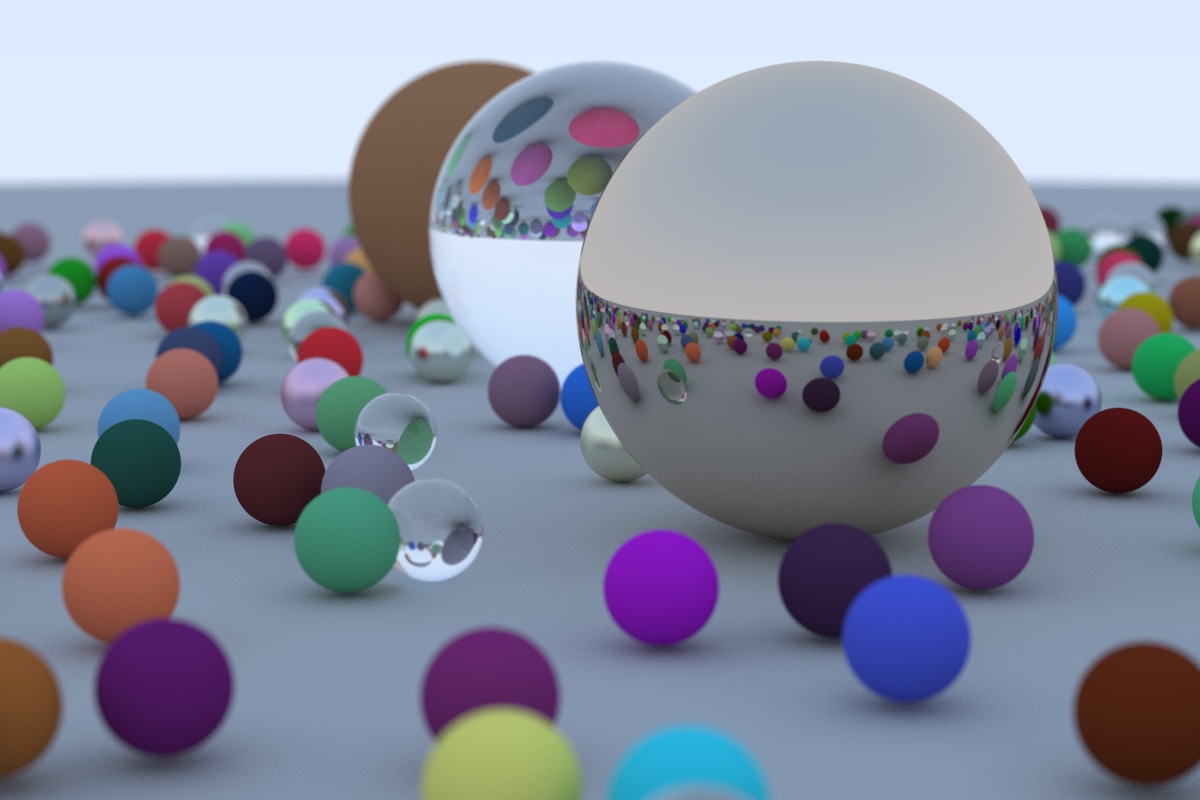
First let’s make the image on the cover of this book — lots of random spheres:
mod camera;
mod color;
mod common;
mod hittable;
mod hittable_list;
mod material;
mod ray;
mod sphere;
mod vec3;

use std::io;
use std::rc::Rc;

use camera::Camera;
use color::Color;
use hittable::{HitRecord, Hittable};
use hittable_list::HittableList;
use material::{Dielectric, Lambertian, Metal};
use ray::Ray;
use sphere::Sphere;
use vec3::Point3;

fn ray_color(r: &Ray, world: &dyn Hittable, depth: i32) -> Color {
    // If we've exceeded the ray bounce limit, no more light is gathered
    if depth <= 0 {
        return Color::new(0.0, 0.0, 0.0);
    }

    let mut rec = HitRecord::new();
    if world.hit(r, 0.001, common::INFINITY, &mut rec) {
        let mut attenuation = Color::default();
        let mut scattered = Ray::default();
        if rec
            .mat
            .as_ref()
            .unwrap()
            .scatter(r, &rec, &mut attenuation, &mut scattered)
        {
            return attenuation * ray_color(&scattered, world, depth - 1);
        }
        return Color::new(0.0, 0.0, 0.0);
    }

    let unit_direction = vec3::unit_vector(r.direction());
    let t = 0.5 * (unit_direction.y() + 1.0);
    (1.0 - t) * Color::new(1.0, 1.0, 1.0) + t * Color::new(0.5, 0.7, 1.0)
}

fn random_scene() -> HittableList {
    let mut world = HittableList::new();

    let ground_material = Rc::new(Lambertian::new(Color::new(0.5, 0.5, 0.5)));
    world.add(Box::new(Sphere::new(
        Point3::new(0.0, -1000.0, 0.0),
        1000.0,
        ground_material,
    )));

    for a in -11..11 {
        for b in -11..11 {
            let choose_mat = common::random_double();
            let center = Point3::new(
                a as f64 + 0.9 * common::random_double(),
                0.2,
                b as f64 + 0.9 * common::random_double(),
            );

            if (center - Point3::new(4.0, 0.2, 0.0)).length() > 0.9 {
                if choose_mat < 0.8 {
                    // Diffuse
                    let albedo = Color::random() * Color::random();
                    let sphere_material = Rc::new(Lambertian::new(albedo));
                    world.add(Box::new(Sphere::new(center, 0.2, sphere_material)));
                } else if choose_mat < 0.95 {
                    // Metal
                    let albedo = Color::random_range(0.5, 1.0);
                    let fuzz = common::random_double_range(0.0, 0.5);
                    let sphere_material = Rc::new(Metal::new(albedo, fuzz));
                    world.add(Box::new(Sphere::new(center, 0.2, sphere_material)));
                } else {
                    // Glass
                    let sphere_material = Rc::new(Dielectric::new(1.5));
                    world.add(Box::new(Sphere::new(center, 0.2, sphere_material)));
                }
            }
        }
    }

    let material1 = Rc::new(Dielectric::new(1.5));
    world.add(Box::new(Sphere::new(
        Point3::new(0.0, 1.0, 0.0),
        1.0,
        material1,
    )));

    let material2 = Rc::new(Lambertian::new(Color::new(0.4, 0.2, 0.1)));
    world.add(Box::new(Sphere::new(
        Point3::new(-4.0, 1.0, 0.0),
        1.0,
        material2,
    )));

    let material3 = Rc::new(Metal::new(Color::new(0.7, 0.6, 0.5), 0.0));
    world.add(Box::new(Sphere::new(
        Point3::new(4.0, 1.0, 0.0),
        1.0,
        material3,
    )));

    world
}

fn main() {
    // Image

    const ASPECT_RATIO: f64 = 3.0 / 2.0;
    const IMAGE_WIDTH: i32 = 1200;
    const IMAGE_HEIGHT: i32 = (IMAGE_WIDTH as f64 / ASPECT_RATIO) as i32;
    const SAMPLES_PER_PIXEL: i32 = 500;
    const MAX_DEPTH: i32 = 50;

    // World

    let world = random_scene();

    // Camera

    let lookfrom = Point3::new(13.0, 2.0, 3.0);
    let lookat = Point3::new(0.0, 0.0, 0.0);
    let vup = Point3::new(0.0, 1.0, 0.0);
    let dist_to_focus = 10.0;
    let aperture = 0.1;

    let cam = Camera::new(
        lookfrom,
        lookat,
        vup,
        20.0,
        ASPECT_RATIO,
        aperture,
        dist_to_focus,
    );

    // Render

    print!("P3\n{} {}\n255\n", IMAGE_WIDTH, IMAGE_HEIGHT);

    for j in (0..IMAGE_HEIGHT).rev() {
        eprint!("\rScanlines remaining: {} ", j);
        for i in 0..IMAGE_WIDTH {
            let mut pixel_color = Color::new(0.0, 0.0, 0.0);
            for _ in 0..SAMPLES_PER_PIXEL {
                let u = (i as f64 + common::random_double()) / (IMAGE_WIDTH - 1) as f64;
                let v = (j as f64 + common::random_double()) / (IMAGE_HEIGHT - 1) as f64;
                let r = cam.get_ray(u, v);
                pixel_color += ray_color(&r, &world, MAX_DEPTH);
            }
            color::write_color(&mut io::stdout(), pixel_color, SAMPLES_PER_PIXEL);
        }
    }

    eprint!("\nDone.\n");
}
This gives:

An interesting thing you might note is the glass balls don’t really have shadows which makes them look like they are floating. This is not a bug — you don’t see glass balls much in real life, where they also look a bit strange, and indeed seem to float on cloudy days. A point on the big sphere under a glass ball still has lots of light hitting it because the sky is re-ordered rather than blocked.
Next Steps
You now have a cool ray tracer! What next? Here are some ideas to further explore Rust features:
-
Parallelize the program using the
rayon(opens in a new tab) crate -
Use
Option<T>to return optional data inHittable::hit()andMaterial::scatter() -
Replace trait objects (dynamic dispatch) with enum and pattern matching
-
Use the
indicatif(opens in a new tab) crate to show a progress bar -
Use the
builder(opens in a new tab) pattern to initialize theCamerastruct -
Write some tests using the
test(opens in a new tab) attribute -
Use the
bench(opens in a new tab) attribute or thecriterion(opens in a new tab) crate to do benchmarking
If you want to learn more about ray tracing, be sure to check out the original Ray Tracing in One Weekend series (opens in a new tab):
Note that this tutorial is based on version 3 (opens in a new tab) of the first book. The original authors are working on version 4. In the new version, the final rendering result is the same, but they introduce a new interval class and move some code from the main() function to the camera class. Before you continue to follow the original series in version 4, you might want to implement those changes.
Lastly, if you like this tutorial, leave a star on GitHub (opens in a new tab)!